
避坑指南!基于NginxConfig部署Hexo静态博客到云服务器
老版教程
老版本教程
前言
之前Hexo部署在coding,后面coding要钱了,就改静态托管在了github和gitee,当然访问速度极其慢,但胜在人家免费啊,没办法只好妥协。到后面突然发现github和gitee都访问不了我的blog了,太惨了,没办法,趁着阿里云搞活动,买了个2core2g的云服务器来搭建搭建,这里记录一下我的踩坑历程。
此教程更新于2022年08月12日,相较老板本的教程,采用NginxConfig便捷生成Nginx配置,同时对细节做了一定处理。
这篇教程适合:
- 有一定linux基础;
- 有本地搭建hexo并部署过github等平台经验的人;
- 对nginx有点点了解的人;
- 按照网上一些Blog搭建最后访问页面呈现403Forbidden的人;
- 以小白视角,只管搭建好能用就行的人;
先按照这篇Blog进行搭建
Next
按照上面那篇博客搭建完成后,访问云服务器IP,不出意外,你会发现页面呈现的是403Forbidden。(如果是其他错误,请检查配置过程有误错漏,并利用百度解决)
我在这里先贴出我的配置文件:
1.blog.conf
1 | server{ |
2./etc/nginx/nginx.conf(主要查看blog路径server里面的内容就好)
1 | # For more information on configuration, see: |
Important Tips
在上面那篇Blog文章的第六步,创建git仓库那里,如果你们是在post-receive输入:
git --work-tree=/home/www/website --git-dir=/home/git/blog.git checkout -f
你们会发现,本地deploy后,你们网站的根目录是没有任何文件的!因为nginx启动后会去根目录访问index.html,而你们的根目录是空的,访问不到,所以会报错403Forbidden。
具体应该把脚本内容改成如下:
1 | !/bin/bash -l |
其中 /home/git/blog.git 为仓库路径,/home/www/website 为博客网站路径,/home/www/tmp/blog 是临时目录。
git 会先将文件拉到临时目录,然后再将所有文件拷贝到博客网站目录 /home/www/website。
保存后退出。
之后,在服务器重新启动下nginx
1 | service nginx restart |
然后再到本地hexo目录下进行deploy,成功后你会发现,网站根目录下有内容了,访问服务器IP,成功访问到Blog页面!

补充
我在这里创建了另一个多月的hooks。
1 | [root@iZwz9aoyyban4v42tgyml2Z blog]# pwd |
1 |
|
其他可供参考的链接
新版教程
新版教程
NginxConfig简介
Nginx是一款非常流行的Web服务器,在使用Nginx的过程中,它的配置很麻烦。而NginxConfig是一款开源的Nginx可视化配置工具,NginxConfig能轻松生成Nginx配置,号称你唯一需要的Nginx配置工具,可以使用可视化界面来生成Nginx配置,功能非常强大,在Github上已有15K+Star!
NginxConfig安装
安装Git和Node.js
Git安装
由于后续Deploy我们的Hexo博客需要,这里安装Git。
1 | yum -y install git |
Nginx安装
请自行百度或google安装……
Node.js安装
由于NginxConfig是一个基于Vue的前端项目,我们首先得安装Node.js。
下载地址:https://nodejs.org/zh-cn/download/
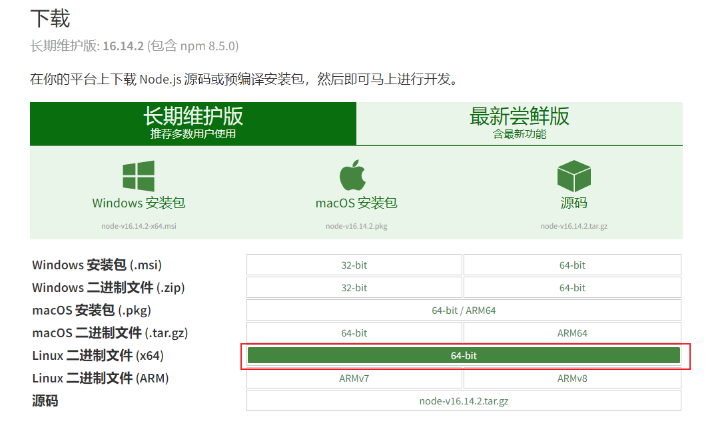
下载成功后将安装包解压到/usr/local/src/目录下,使用如下命令即可;
1 | cd /usr/local/src/ |
使用./bin/node -v命令可查看当前安装版本;
如果想在Linux命令行中直接运行,还需对node和npm命令创建软链接;
1 | ln -s /usr/local/src/node-v16.14.2-linux-x64/bin/node /usr/bin/node |
创建完成后使用命令查看版本,至此Node.js安装完成。
1 | [root@iZwz9aoyyban4v42tgyml2Z nginx]# node -v |
安装NginxConfig
Node.js安装完成后,就可以开始安装NginxConfig了。
首先下载NginxConfig的安装包,下载地址。
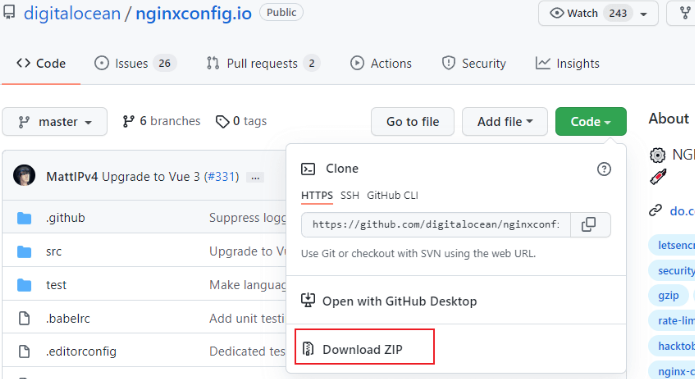
下载完成后解压到指定目录,并使用npm命令安装依赖并运行;
1 | tar -zxvf nginxconfig.io-master.tar.gz |
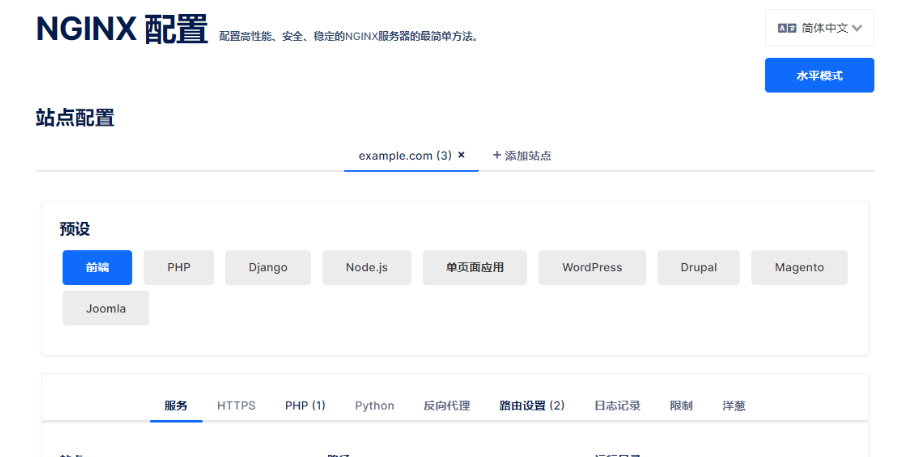
NginxConfig运行成功后就可以直接访问了,看下界面支持中文还是挺不错的,访问地址:http://[云服务器IP]:8080
Hexo Deploy前相关配置
创建Git仓库和网页根目录
找一个路径,创建两个文件夹,分别作为git仓库和Hexo博客存放的根目录。
1 | cd /home && mkdir -p mysite/repos mysite/www |
当我们将Hexo博客部署到blog.git的时候,就会触发post-receive脚本,执行相应的操作。
编辑post-receive文件,并赋予其相应执行权限
1 | vim /home/mysite/repos/blog.git/hooks/post-receive |
post-receive配置文件内容
1
2
3
4
5
6
7
8
GIT_REPO=/home/mysite/repos/blog.git
TMP_GIT_CLONE=/home/mysite/www/tmp/blog
PUBLIC_WWW=/home/mysite/www/website
rm -rf ${TMP_GIT_CLONE}
git clone $GIT_REPO $TMP_GIT_CLONE
rm -rf ${PUBLIC_WWW}/*
cp -rf ${TMP_GIT_CLONE}/* ${PUBLIC_WWW}
赋予执行权限:sudo chmod +x post-receive
生成Nginx配置文件
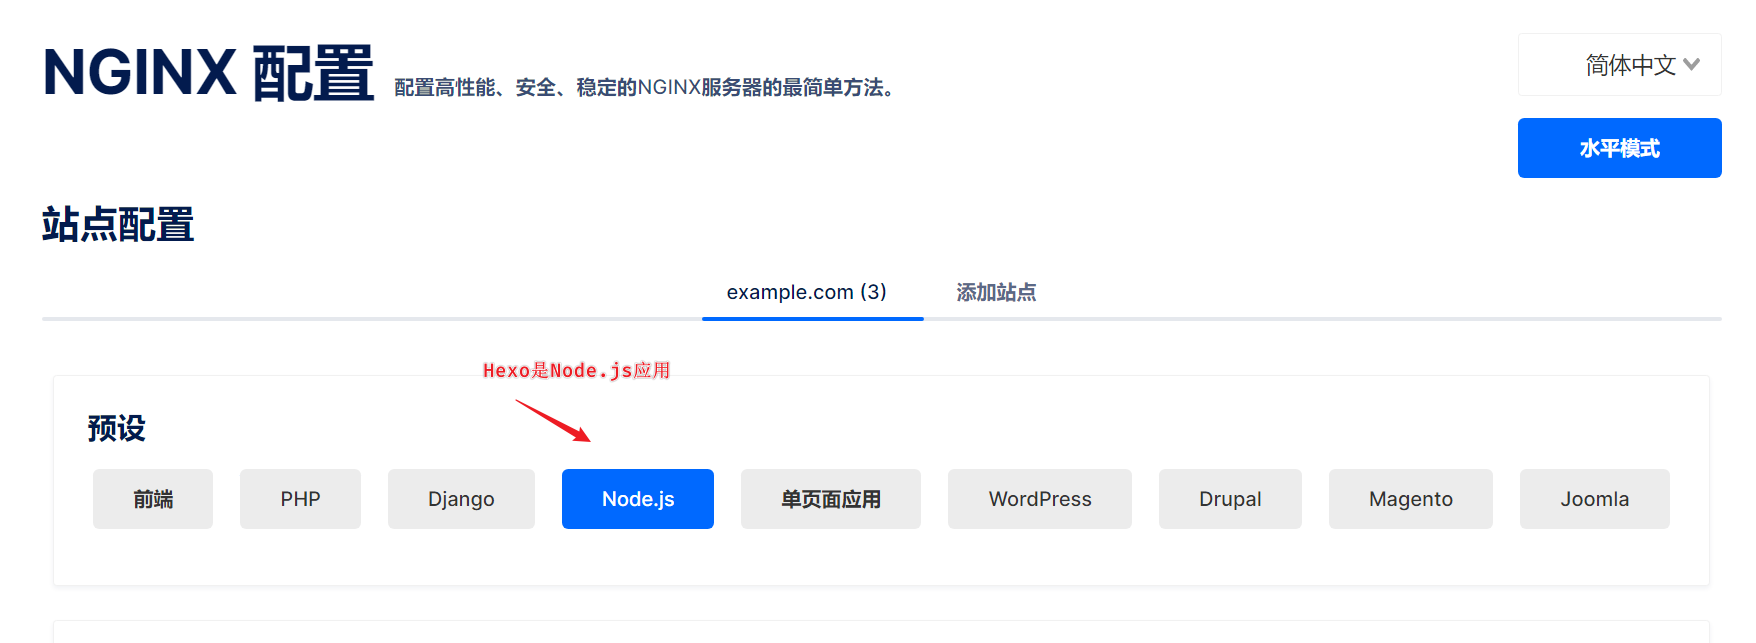
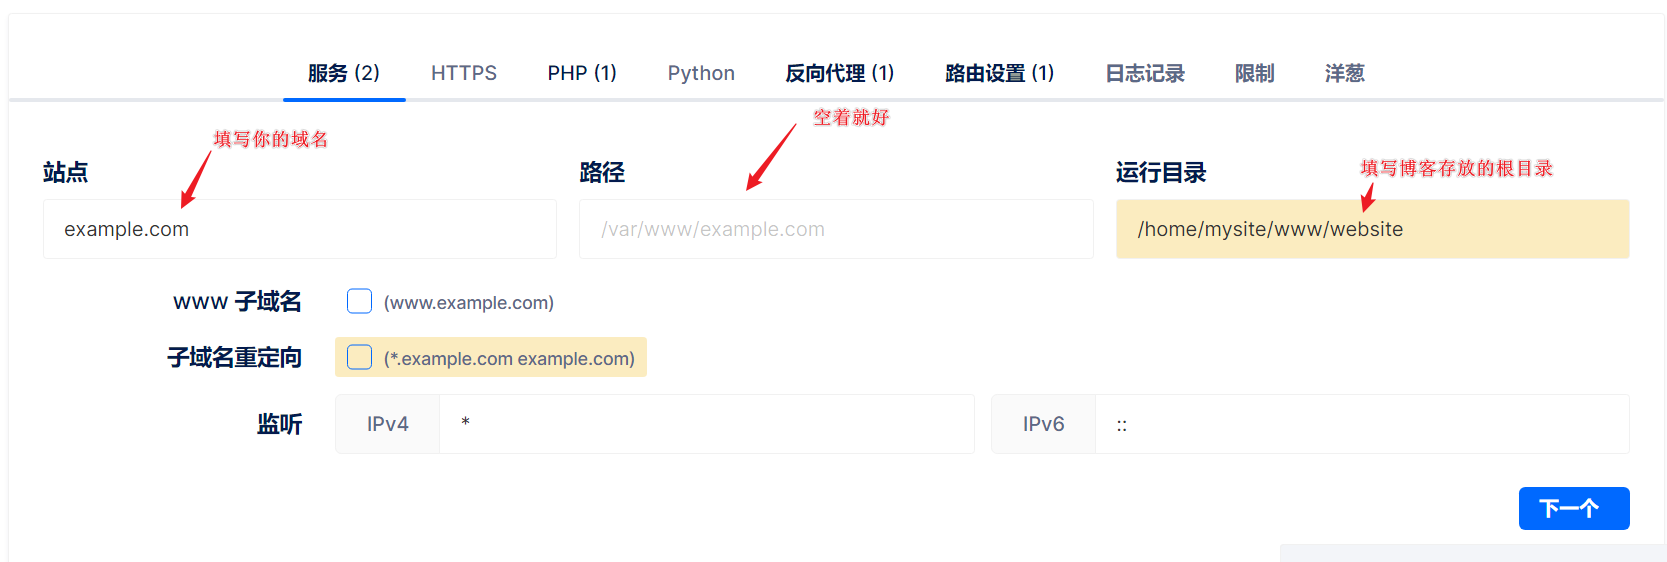
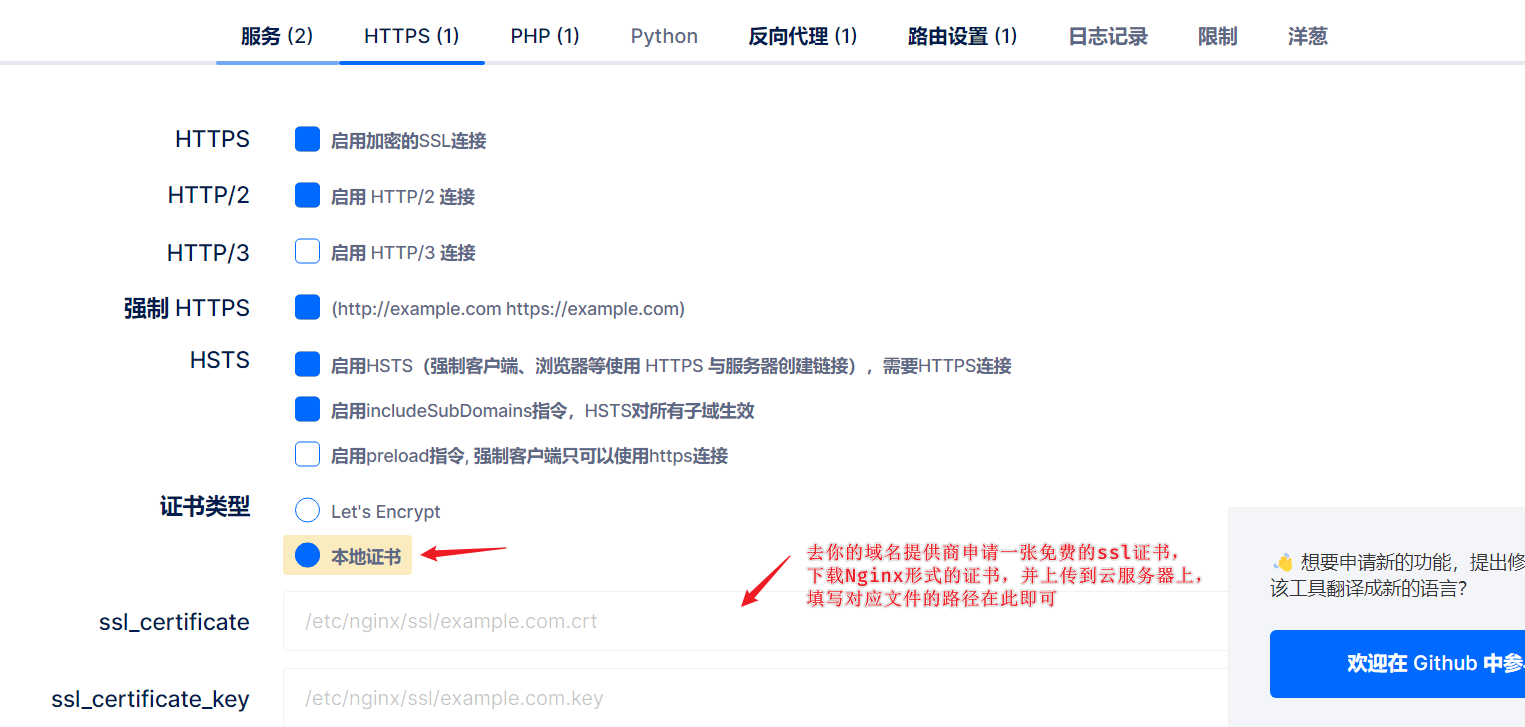
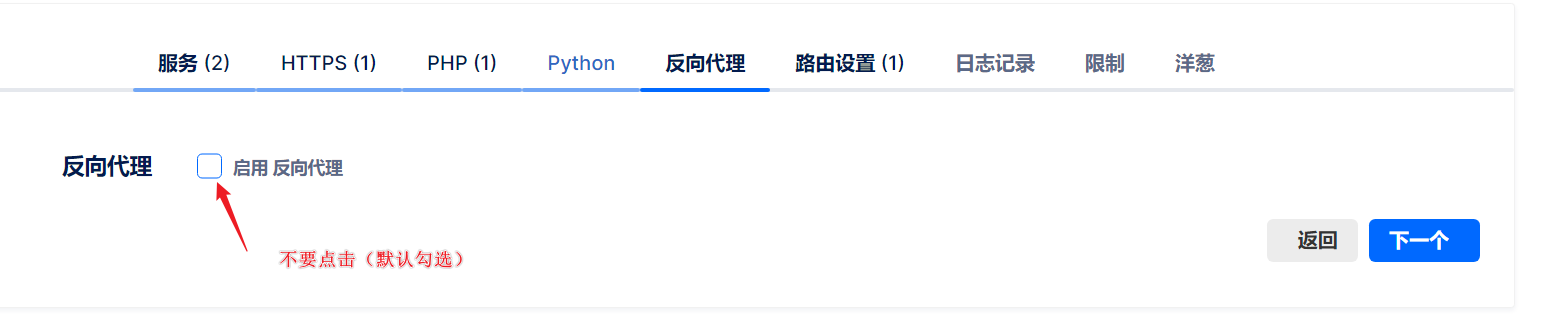
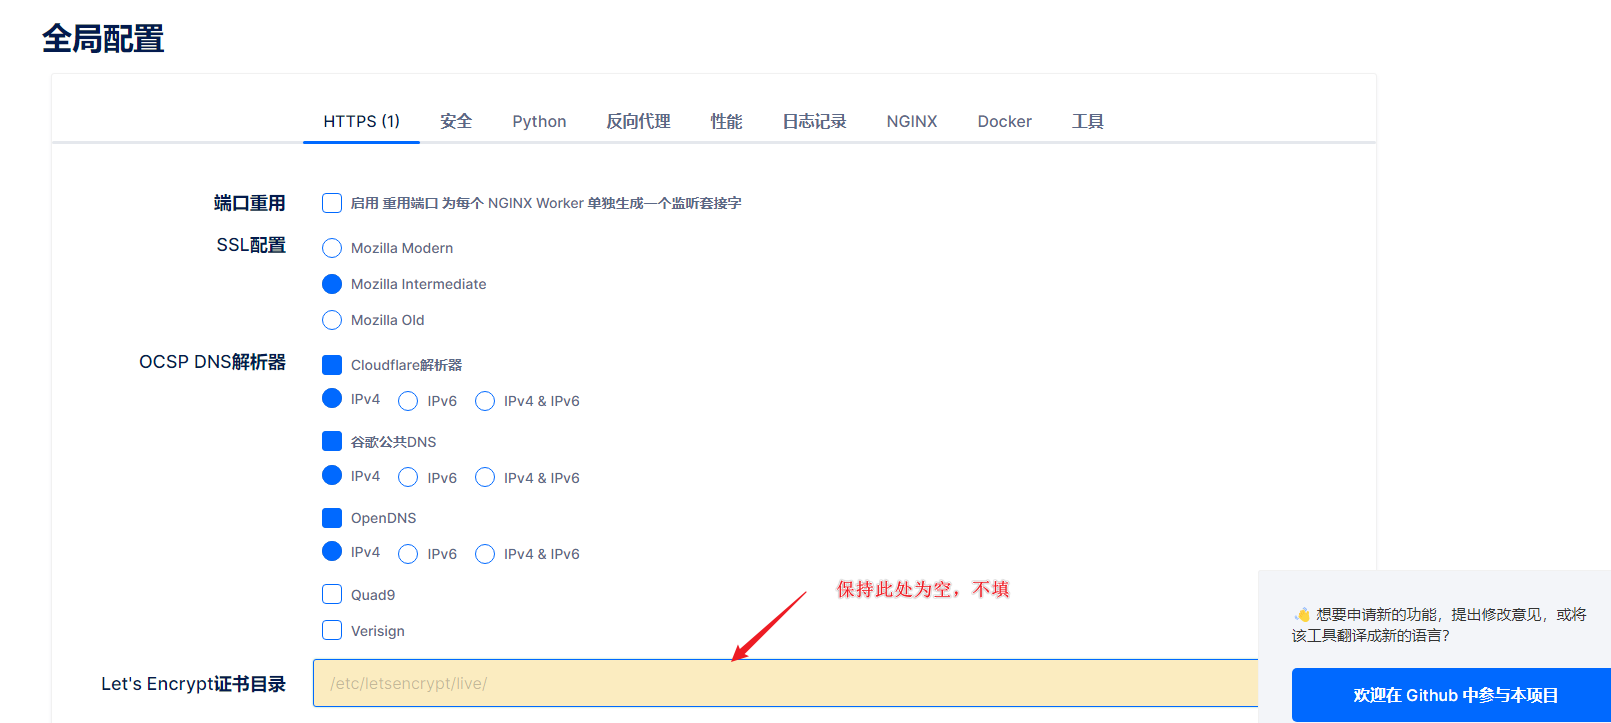
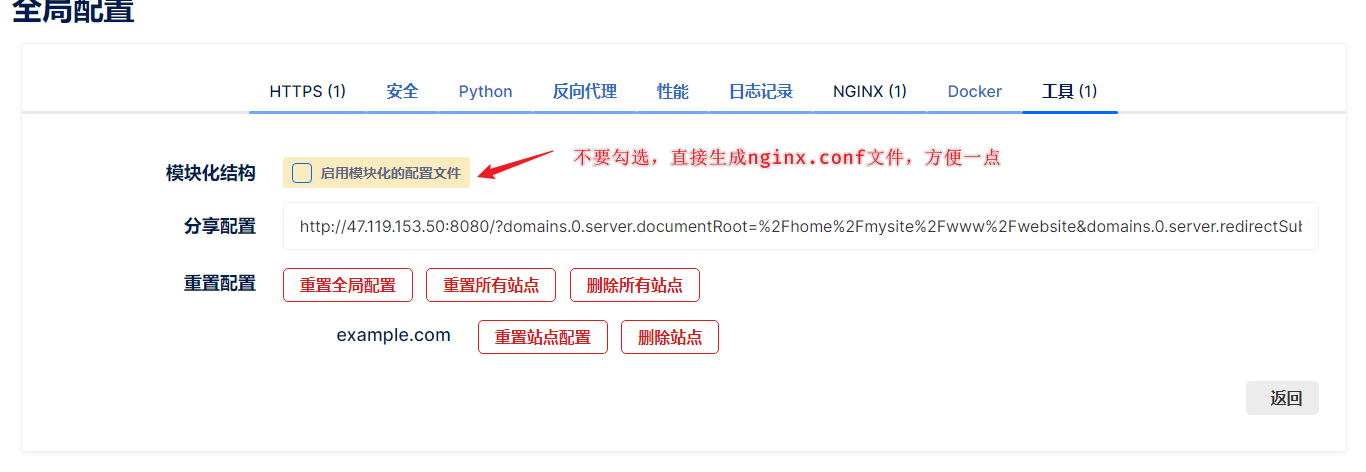
我们打开NginxConfig网页,进行配置,这里我们只配置图片中提到的配置项:
选择预设 配置站点域名及根目录 配置HTTPS访问 禁用反向代理 配置路由 接下来是全局配置: 对于生成的 NginxConfig配置

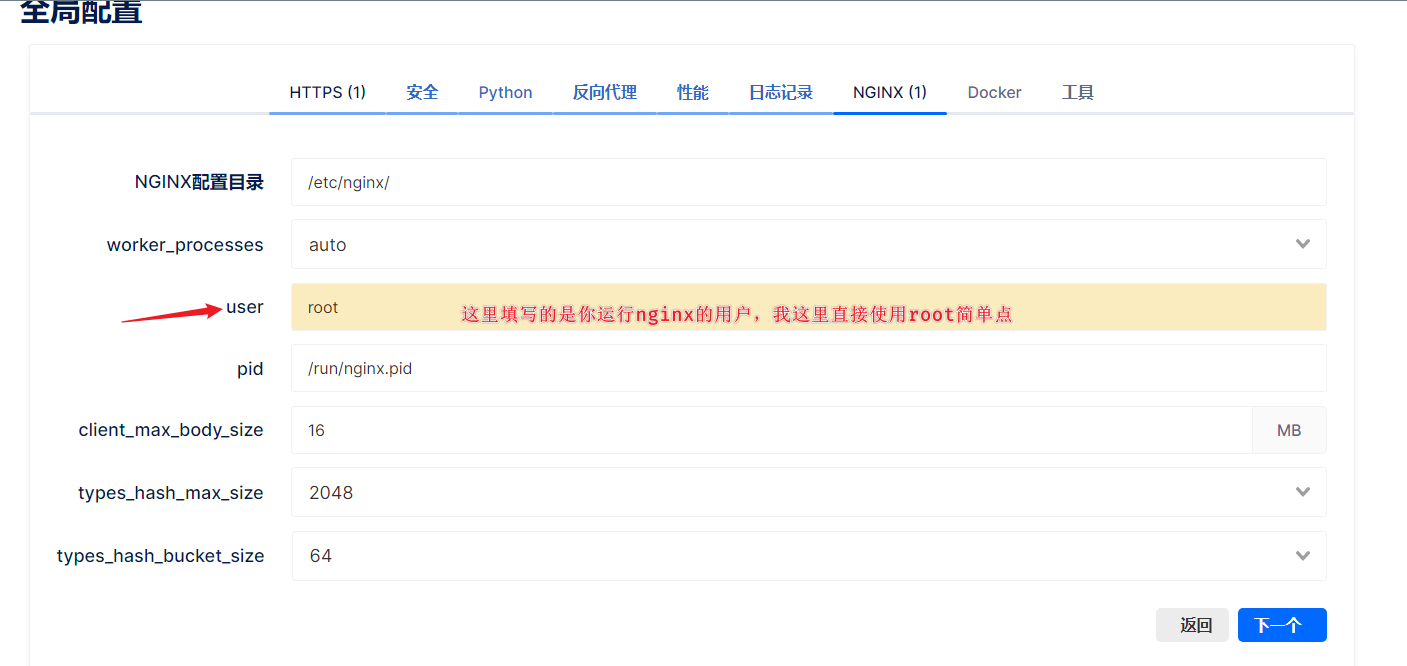
nginx.conf文件,这里要注意两个地方,一个是example.com配置代码块: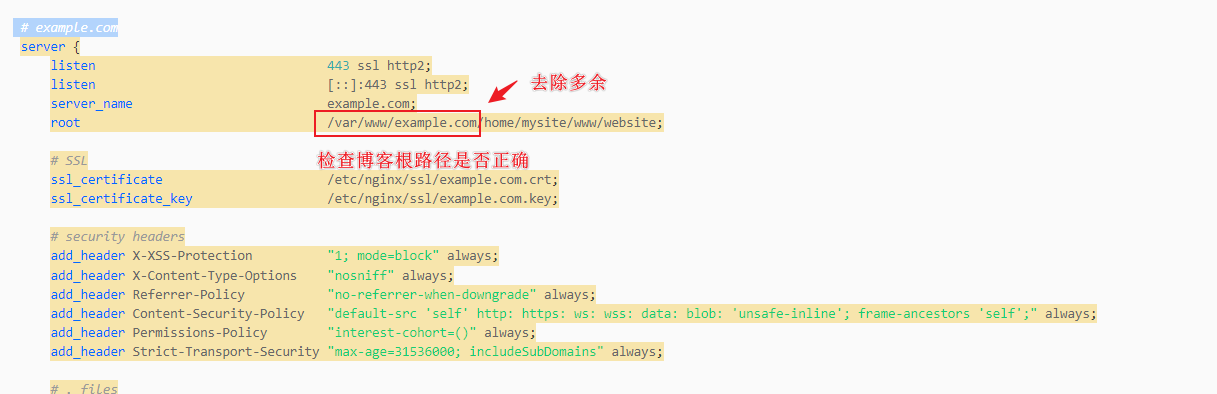

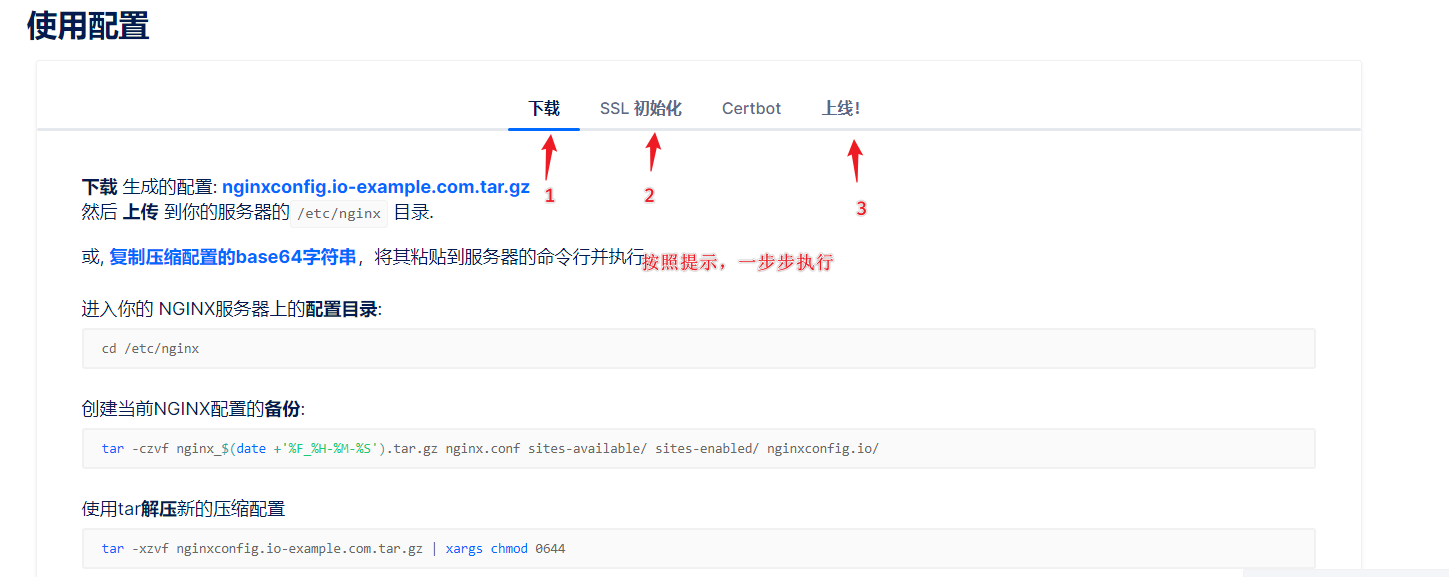
在上述步骤中,我们设置好相应的配置,就会生成对应的nginx.conf配置文件,这里我们直接复制该文件,然后到/etc/nginx/目录下替换nginx.conf文件,接着运行:
1 | sudo nginx -t && sudo systemctl reload nginx |
至此,我们已经正常生成了配置文件并成功运行,访问你的博客看看吧!