前言 博客搭建好后,隔了差不多半个月,工信部审核域名发下来了!终于可以用域名访问Blog了,甚是开心。不过浏览器左上角的不安全警告小图标甚是烦人,作为略有一点完美主义倾向的我怎么忍的了? 于是乎便有了这篇教程。
这篇教程适合:
有一定linux基础;
有本地搭建hexo并部署过github等平台经验的人;
对nginx有点点了解的人;
成功在阿里云服务器上用Nginx部署了Hexo静态博客;
对Http不安全访问警告烦躁的人;
1.去域名服务商申请免费的SSL证书 申请到ssl证书后,去域名解析把ssl证书解析到你的域名,一般ssl证书都有自动解析的功能。可以把它下载下来,解压缩后在文件里可以找到有xxx.com.pem和xxx.com.key的两个文件,在服务器上新建个cert文件夹,将这两个文件放置在文件夹中,pwd查看当前路径,保存当前路径。
2.开放服务器80、443端口 去阿里云控制台进入ESC实例去配置安全组,自定义TCP开放443端口。这个可以自行百度 “阿里云如何开放443端口”。
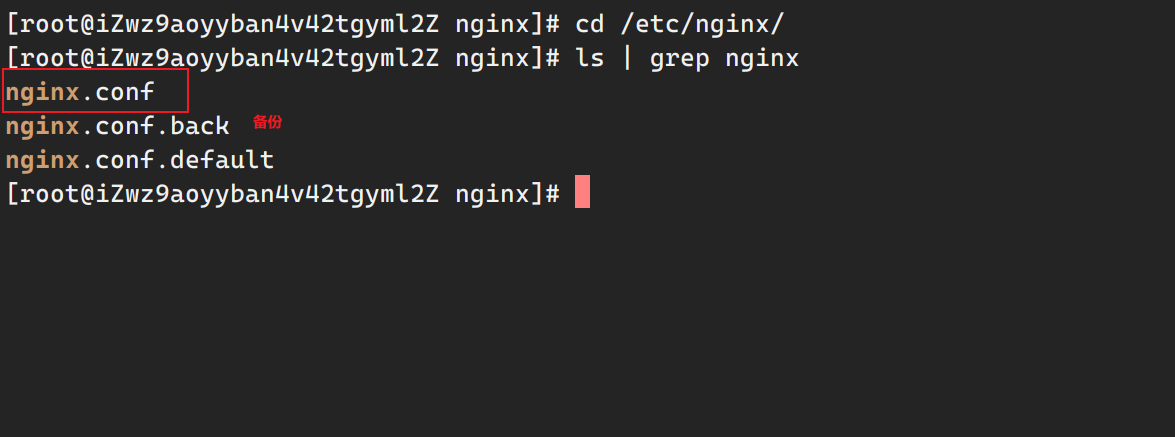
3.登陆服务器配置Nginx 进入到Nginx的配置目录,修改nginx.conf文件
这里贴出修改后的nginx.conf文件代码:
1
2
3
4
5
6
7
8
9
10
11
12
13
14
15
16
17
18
19
20
21
22
23
24
25
26
27
28
29
30
31
32
33
34
35
36
37
38
39
40
41
42
43
44
45
46
47
48
49
50
51
52
53
54
55
56
57
58
59
60
61
62
63
64
65
66
67
68
69
70
71
72
73
74
75
76
77
78
79
80
81
82
83
84
85
86
87
88
89
90
91
92
93
94
95
96
97
98
99
100
101
# For more information on configuration, see: # * Official English Documentation: http://nginx.org/en/docs/ # * Official Russian Documentation: http://nginx.org/ru/docs/ # nginx user root; worker_processes auto; error_log /var/log/nginx/error.log; pid /run/nginx.pid; # Load dynamic modules. See /usr/share/doc/nginx/README.dynamic. include /usr/share/nginx/modules/*.conf; events { worker_connections 1024; } http { log_format main '$remote_addr - $remote_user [$time_local] "$request" ' '$status $body_bytes_sent "$http_referer" ' '"$http_user_agent" "$http_x_forwarded_for"'; access_log /var/log/nginx/access.log main; sendfile on; tcp_nopush on; tcp_nodelay on; keepalive_timeout 65; types_hash_max_size 2048; include /etc/nginx/mime.types; default_type application/octet-stream; # Load modular configuration files from the /etc/nginx/conf.d directory. # See http://nginx.org/en/docs/ngx_core_module.html#include # for more information. include /etc/nginx/conf.d/*.conf; include /etc/nginx/vhost/*.conf; server { listen 443 ssl; listen 80 default_server; listen [::]:80 default_server; server_name www.everweekup.com; root 你的博客根目录; index index.html index.htm; ssl_certificate /usr/share/nginx/certficate/everweekup/everweekup.com.pem; #将domain name.pem替换成您证书的文件名称。 ssl_certificate_key /usr/share/nginx/certficate/everweekup/everweekup.com.key; #将domain name.key替换成您证书的密钥文件名称。 ssl_session_timeout 5m; ssl_ciphers ECDHE-RSA-AES128-GCM-SHA256:ECDHE:ECDH:AES:HIGH:!NULL:!aNULL:!MD5:!ADH:!RC4; #表示使用的加密套件的类型。 ssl_protocols TLSv1 TLSv1.1 TLSv1.2; #表示使用的TLS协议的类型。 ssl_prefer_server_ciphers on; # Load configuration files for the default server block. include /etc/nginx/default.d/*.conf; location / { root 你的博客根目录; index index.html index.htm; } error_page 404 /404.html; location = /404.html { } error_page 500 502 503 504 /50x.html; location = /50x.html { } } # Settings for a TLS enabled server. # # server { # listen 443 ssl http2 default_server; # listen [::]:443 ssl http2 default_server; # server_name _; # root /usr/share/nginx/html; # # ssl_certificate "/etc/pki/nginx/server.crt"; # ssl_certificate_key "/etc/pki/nginx/private/server.key"; # ssl_session_cache shared:SSL:1m; # ssl_session_timeout 10m; # ssl_ciphers HIGH:!aNULL:!MD5; # ssl_prefer_server_ciphers on; # # # Load configuration files for the default server block. # include /etc/nginx/default.d/*.conf; # # location / { # } # # error_page 404 /404.html; # location = /404.html { # } # # error_page 500 502 503 504 /50x.html; # location = /50x.html { # } # } }
只需要在server代码块中添加以下内容即可,如果原本有就不需要修改,没有就添加:
可参考阿里云官方文档:https://help.aliyun.com/document_detail/98728.html?spm=5176.22414175.sslink.1.29c17f82gMnYSt
1
2
3
4
5
6
7
8
9
10
11
12
13
14
15
server { listen 443 ssl; listen 80 default_server; listen [::]:80 default_server; server_name www.everweekup.com; root /home/www/hexo; index index.html index.htm; ssl_certificate /usr/share/nginx/certficate/everweekup/everweekup.com.pem; #将domain name.pem替换成您证书的文件名称。 ssl_certificate_key /usr/share/nginx/certficate/everweekup/everweekup.com.key; #将domain name.key替换成您证书的密钥文件名称。 ssl_session_timeout 5m; ssl_ciphers ECDHE-RSA-AES128-GCM-SHA256:ECDHE:ECDH:AES:HIGH:!NULL:!aNULL:!MD5:!ADH:!RC4; #表示使用的加密套件的类型。 ssl_protocols TLSv1 TLSv1.1 TLSv1.2; #表示使用的TLS协议的类型。 ssl_prefer_server_ciphers on;
添加完成后,使用nginx -t检查配置文件有无错,如果正确修改不会报错:
之后再输入systemctl restart nginx命令即可用https访问域名了。
其他可供参考的链接 https://www.jb51.net/article/196874.htm
https://blog.csdn.net/qq_33154343/article/details/114003285
为Nginx搭建部署阿里云的Hexo博客配置Https访问


